Build around your use
Choose shapes, target areas and auxiliary artwork within available templates to explore the layout you need.
TOPABEL · CUSTOMIZATION MADE SIMPLE
No finished artwork needed. Start with a template, personalize its artwork, colors and brand Logo, and preview the result. Then work with TOPABEL on specifications, packaging and a physical sample.
Create your first target ↓TARGETS. MADE FOR YOU.
For ranges, distributors and brands: make the first design conversation visual. Explore the options yourself, then bring a clear starting design to our team.
Choose shapes, target areas and auxiliary artwork within available templates to explore the layout you need.
Try colors and your brand Logo, with the text, size and paper options offered by your template.
Inspect target, range and packaging views. Save your design in this browser and share a preview screenshot with our team.
Design it yourself, or work with our team. Explore TOPABEL Custom & OEM ↗
Start with an available layout, preview each change, then save your design in this browser.
The workbench starts in English. Use the language menu at the top right or Settings → Language to switch between English and Chinese. The Chinese guide uses Chinese interface labels with common English equivalents; the English guide uses English labels.
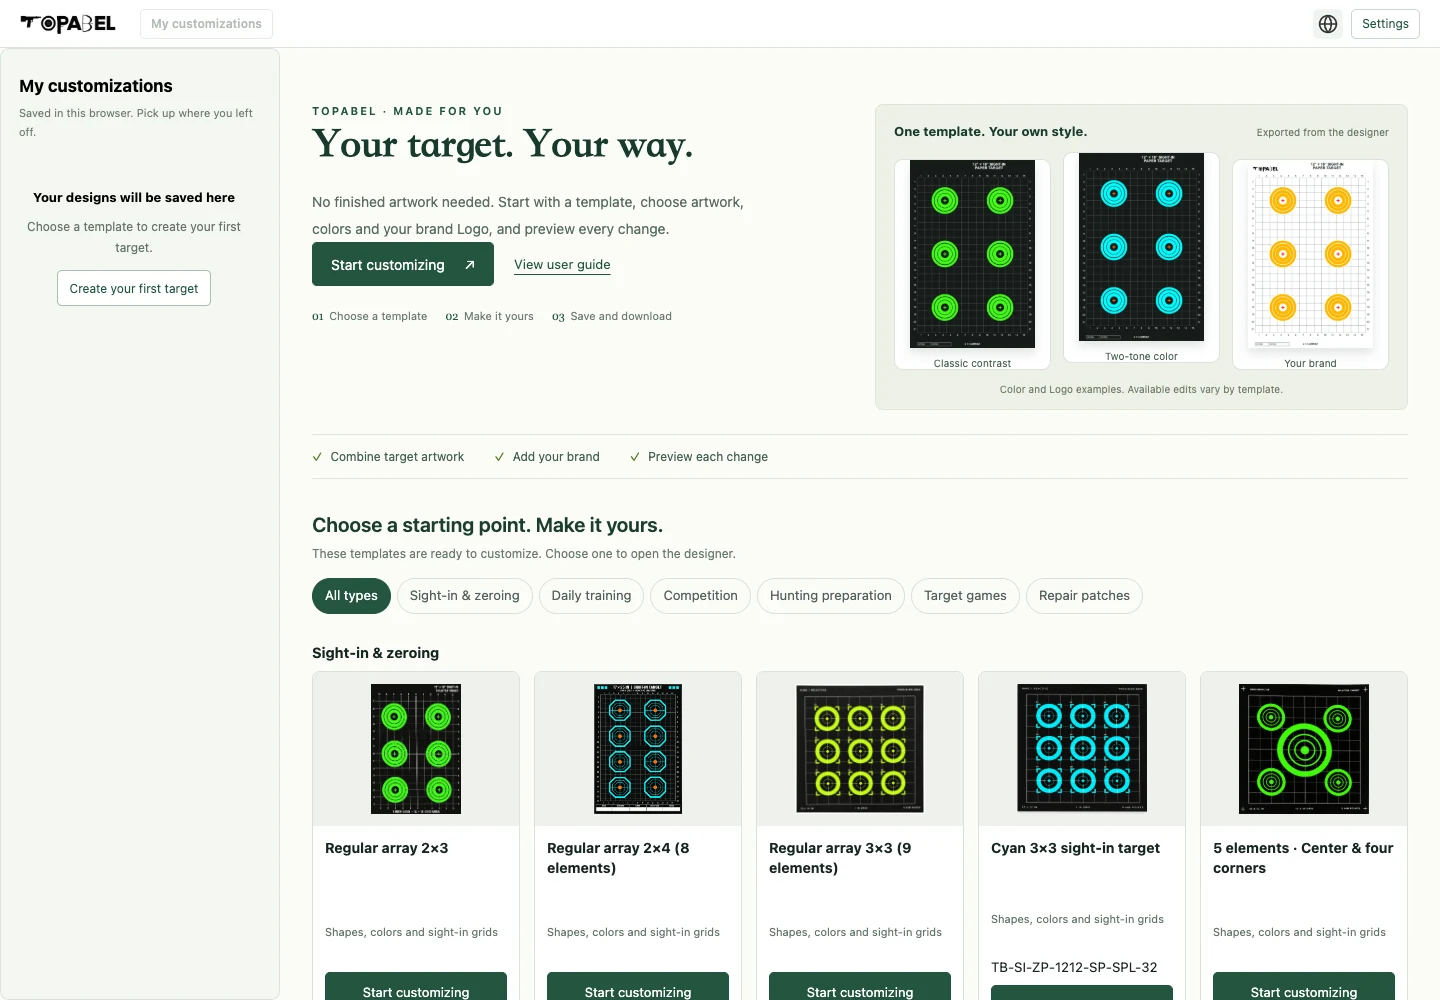
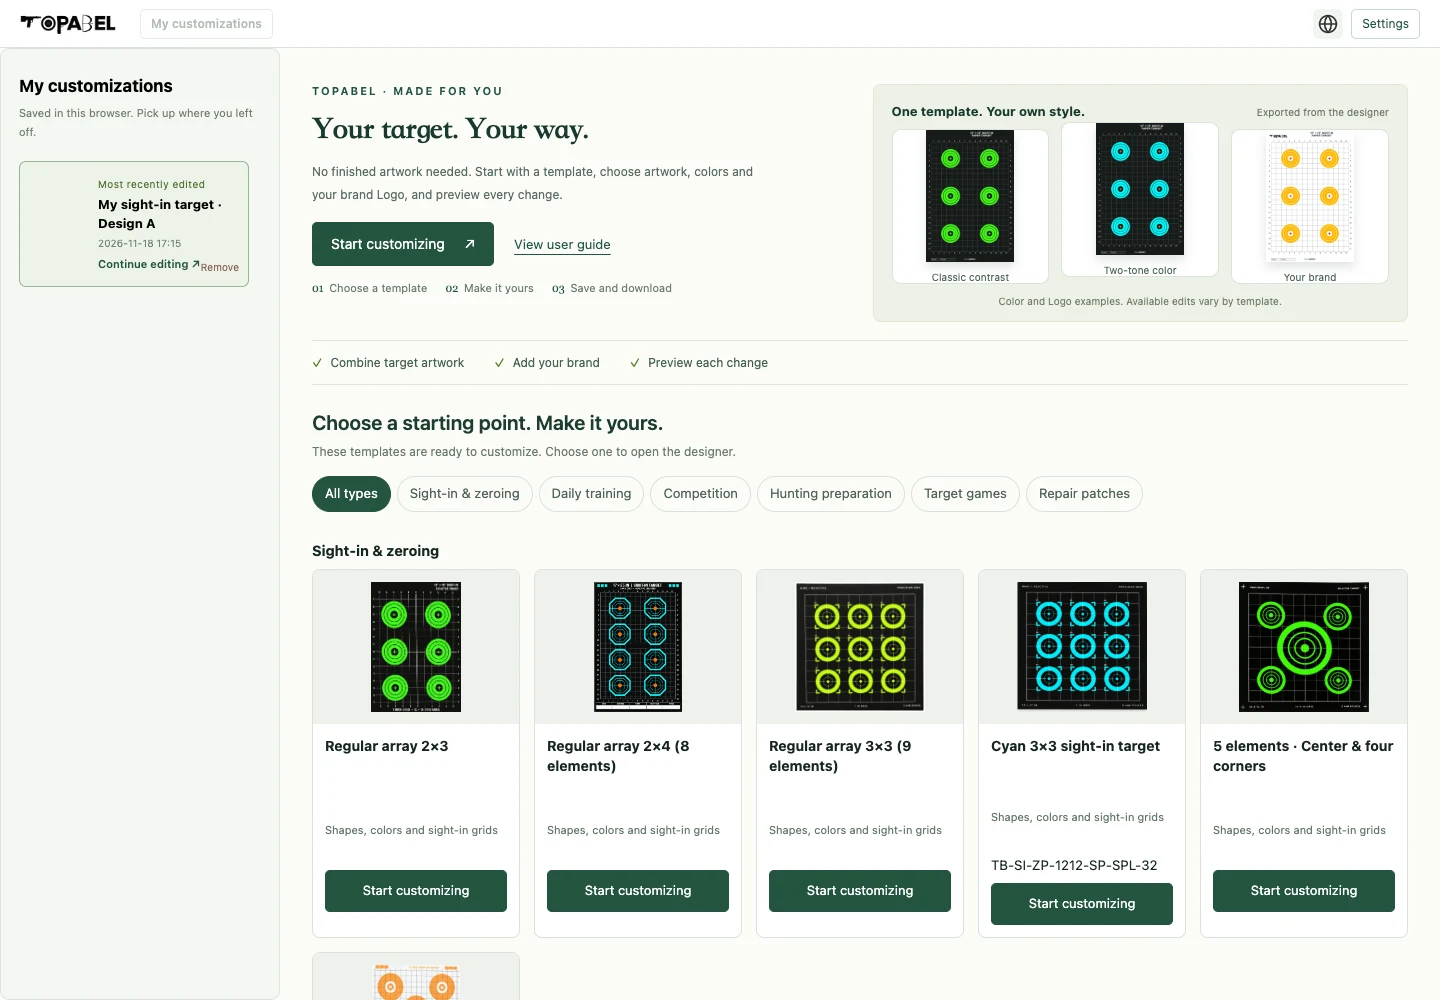
The homepage introduction, “TOPABEL Online Target Paper Designer”, presents the customization steps. Three examples exported from the same template show color and brand Logo changes. Click Start customizing in the introduction to reach available templates.
On desktop, locally saved designs appear on the left and available templates appear first on the right. Filter by use to narrow your choices. More categories · coming later is collapsed by default; its disabled cards cannot open the designer. Try another use if a category has no editable templates.
The saved list highlights Most recently edited. Click a card or Continue editing to reopen it. Long lists scroll independently. Remove is a secondary action with confirmation; use Undo removal immediately if needed. An empty list explains where your designs will be saved.
On mobile, the brand introduction and templates take priority. When saved designs exist, My customizations appears just after a compact introduction so you can continue quickly. The layout adapts to the screen width.
Check each template card for availability. Only cards marked Start customizing open the designer. Saved designs stay in the current browser.
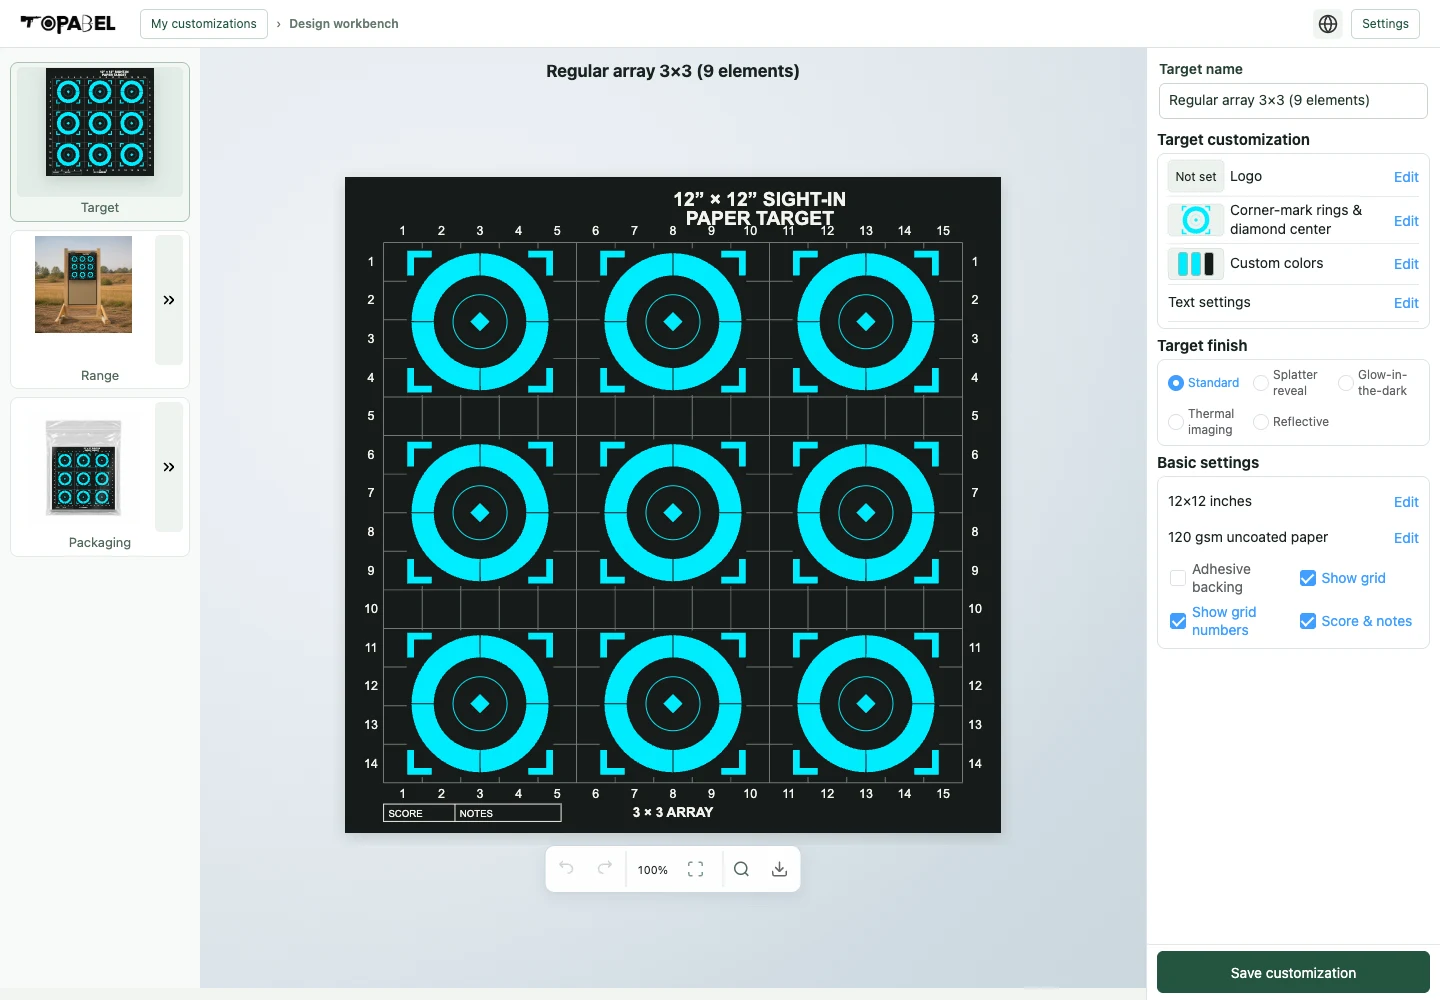
The top navigation reads My customizations › Design workbench. Click My customizations to return. The current design title appears above the canvas; edit its name in the field on the right. Settings and language controls are at the top right.
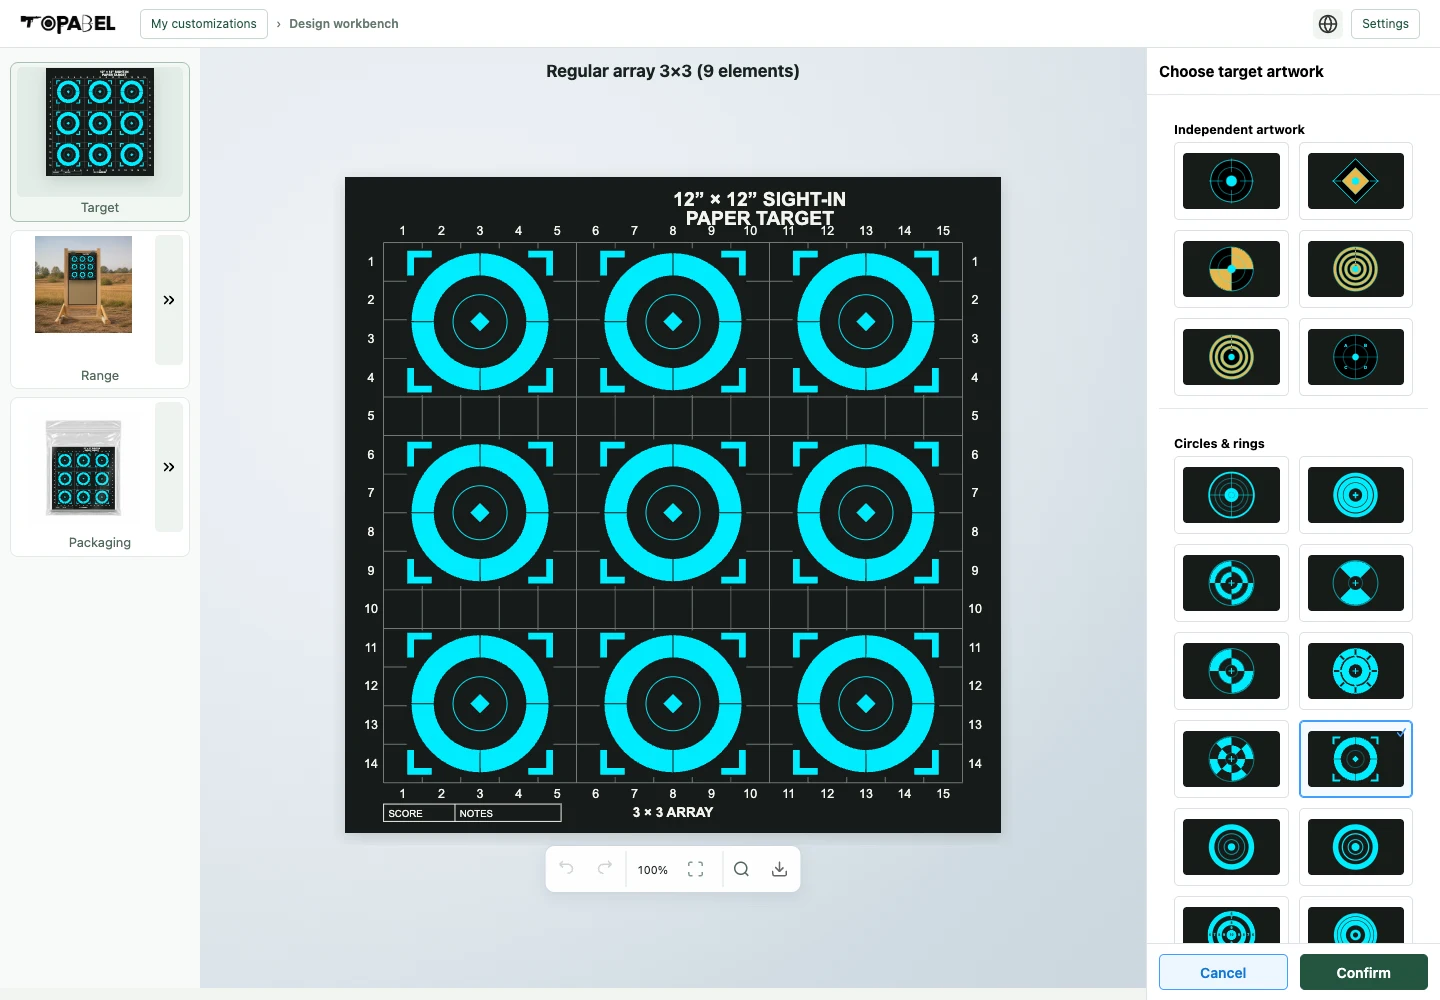
Artwork keeps its proportions. Incompatible choices may be unavailable or omitted. Check physical grid spacing on a sample at the agreed final print size.
The body style changes the silhouette independently of the head and chest targets. Round-shoulder, angular-shoulder and low-shoulder broad-body styles are available, together with complete circular, diamond, capsule and angular scoring motifs. Combine them with compatible existing artwork.
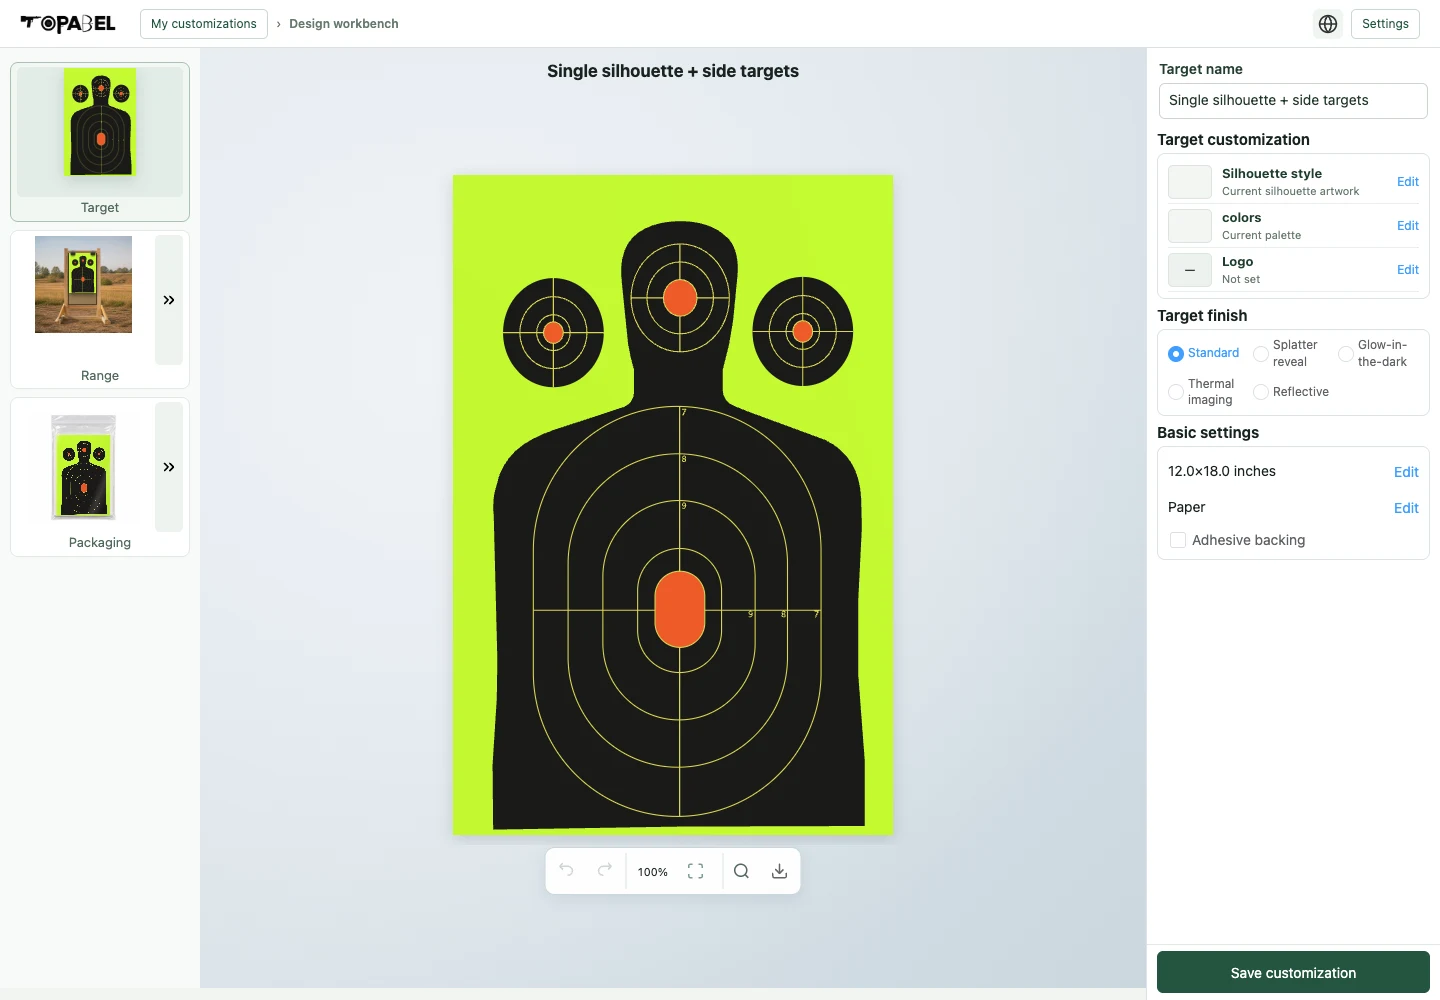
A combination that conflicts with auxiliaries or fixed content is not stretched to fit. Layouts without a target area do not offer that area’s choices.
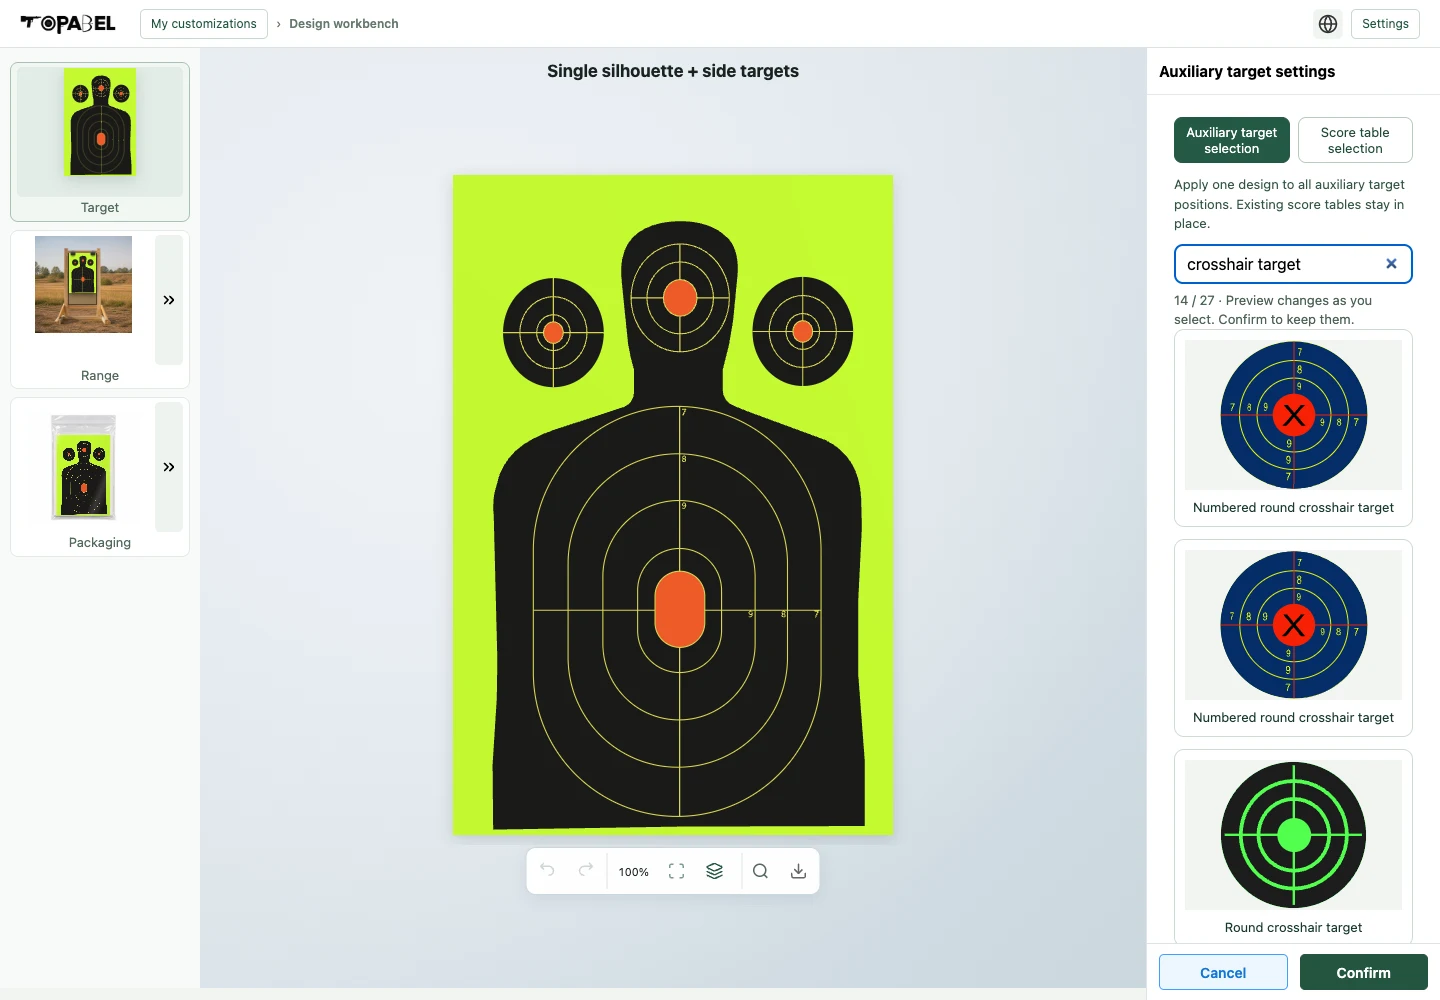
This entry retains compatible center, ring, auxiliary, coordinate and patch choices, and also offers complete main faces. Check whether you are selecting a complete face or an individual native component.
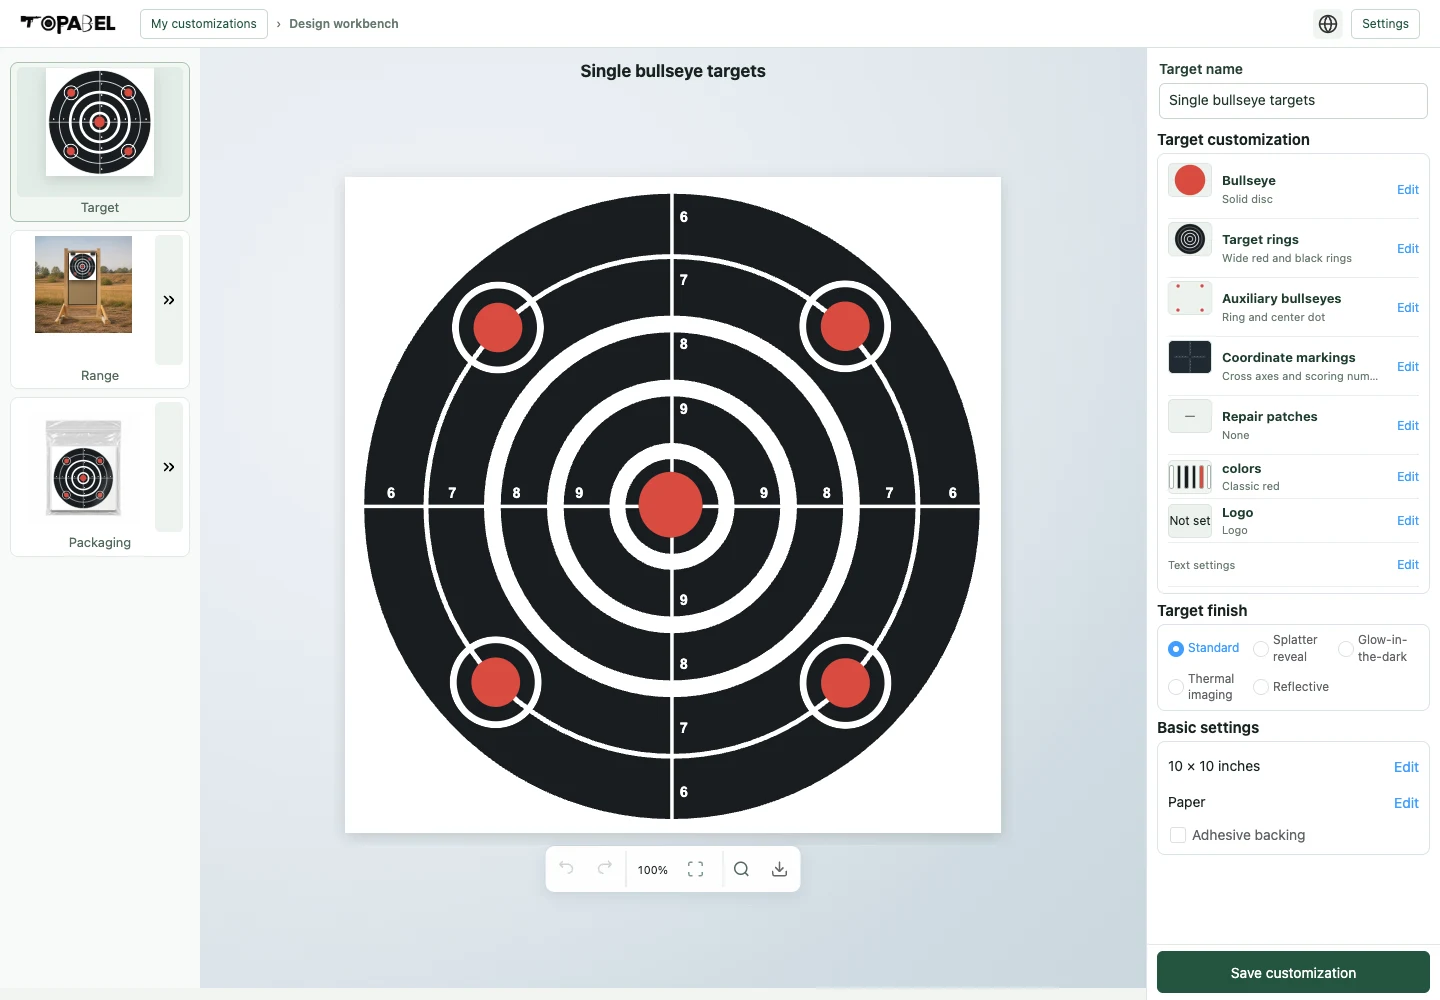
Similar-looking scoring designs do not necessarily use interchangeable values. Some native sheets remain unavailable to avoid distorted rings, mismatched values or incorrect measurement scales.
Geometric and animal patterning share the Zoned patterning entry. Choose the analysis face, center aiming mark, animal artwork, measurement grid and record table separately, without replacing the whole sheet as one image.
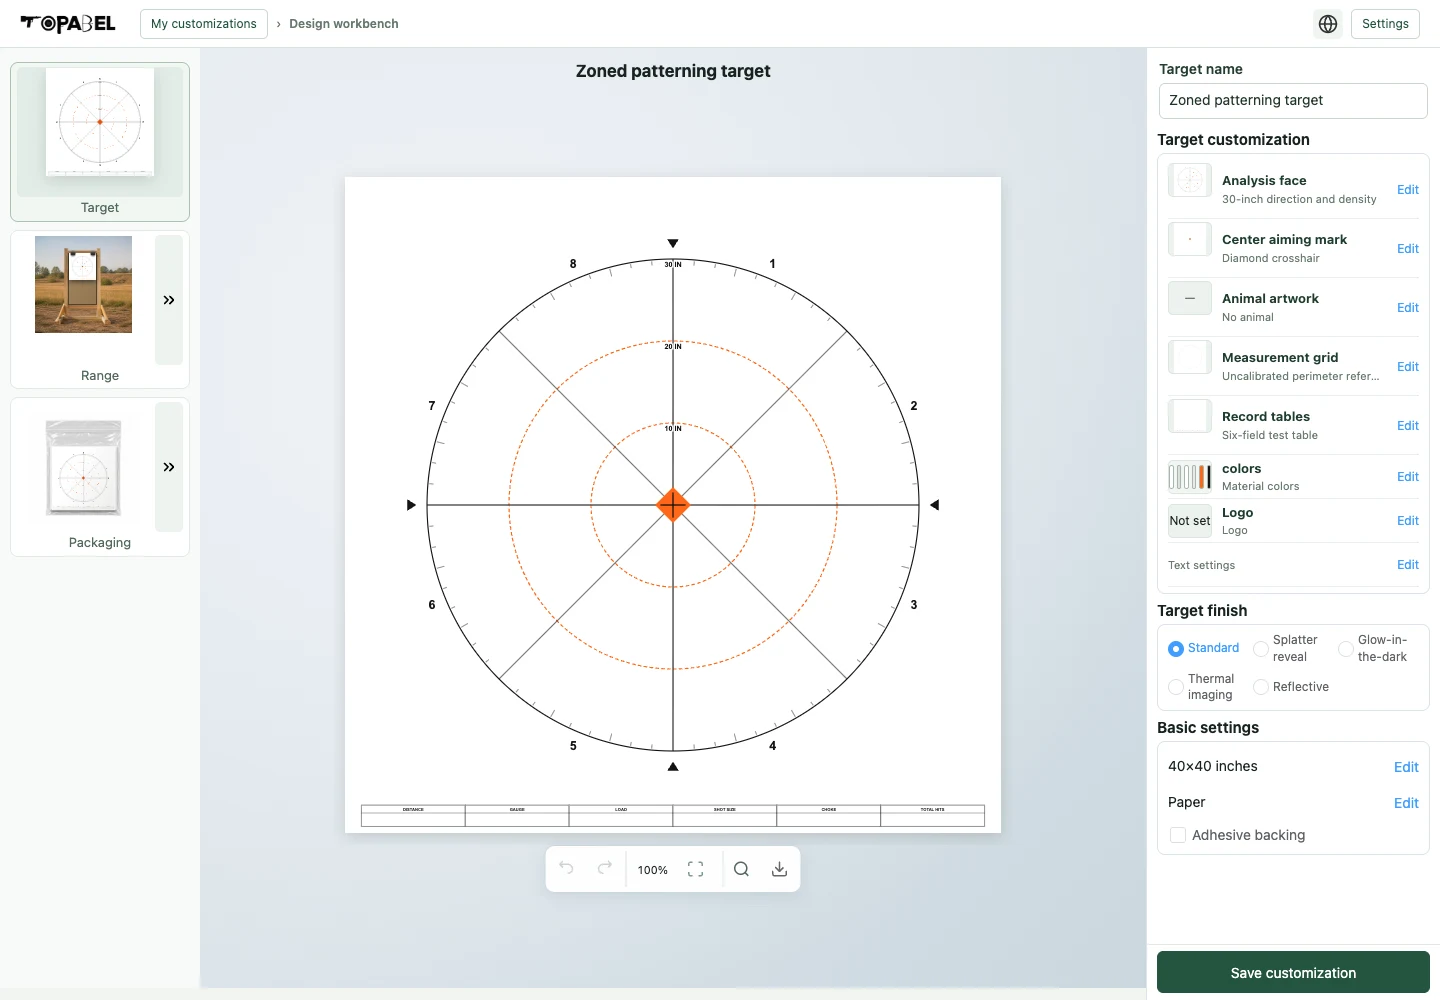
Animal highlights are visual references, not validated anatomy, hit-effect or material-performance claims. Animal artwork without a confirmed clear source is not offered as a selectable material.
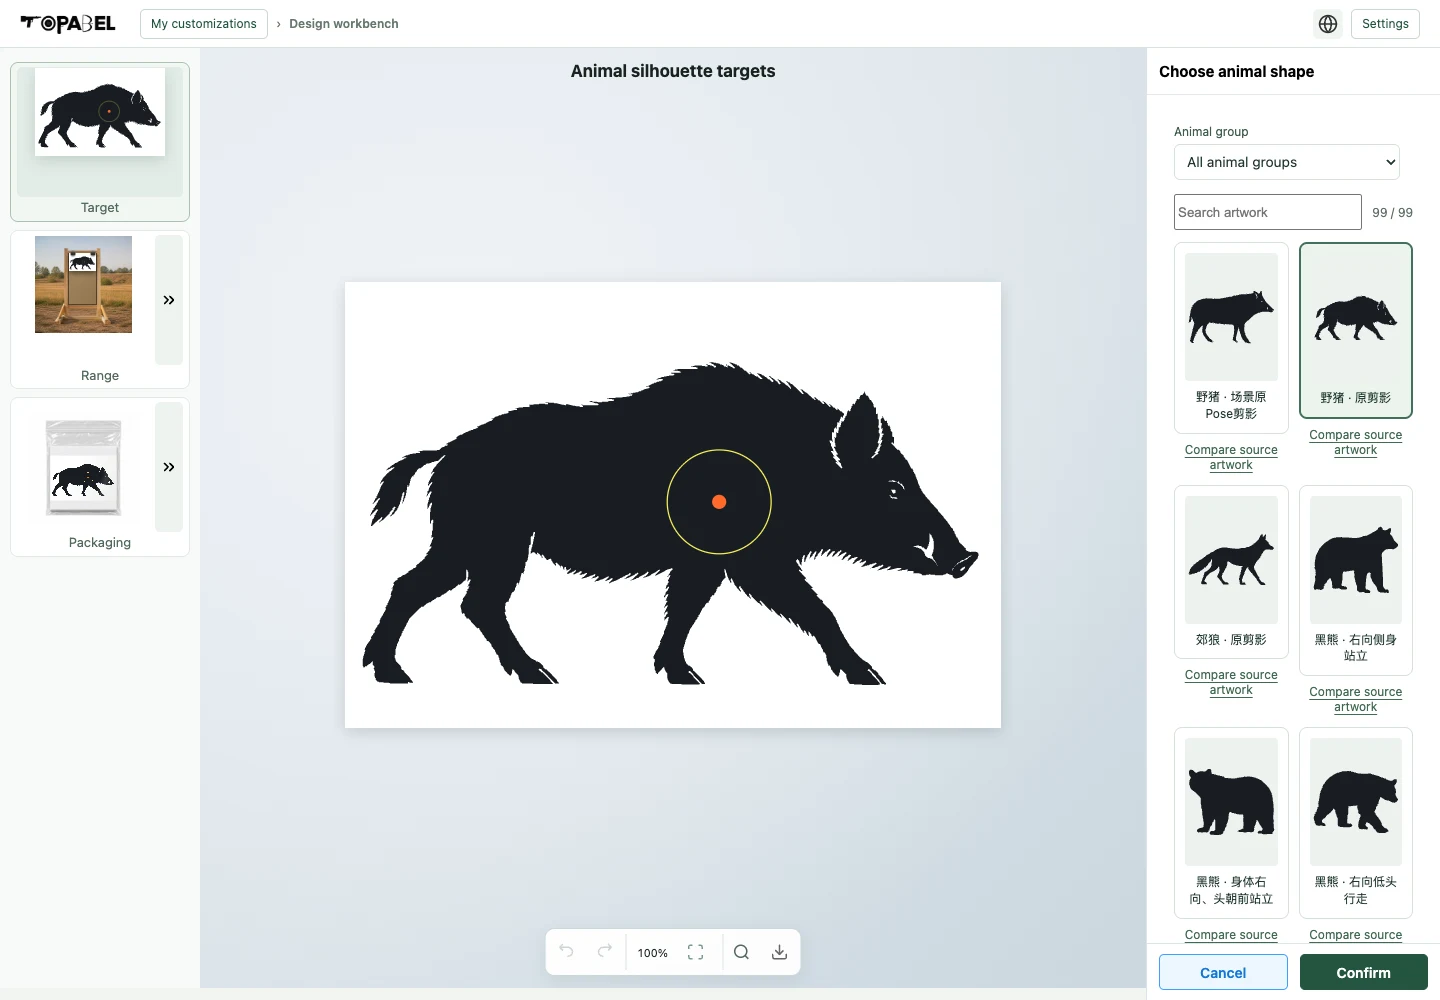
The Animal silhouette entry offers two independent material classes: animal shapes and complete aiming motifs. Filter the shape library by animal group or search, choose a pose, then select the aiming motif.
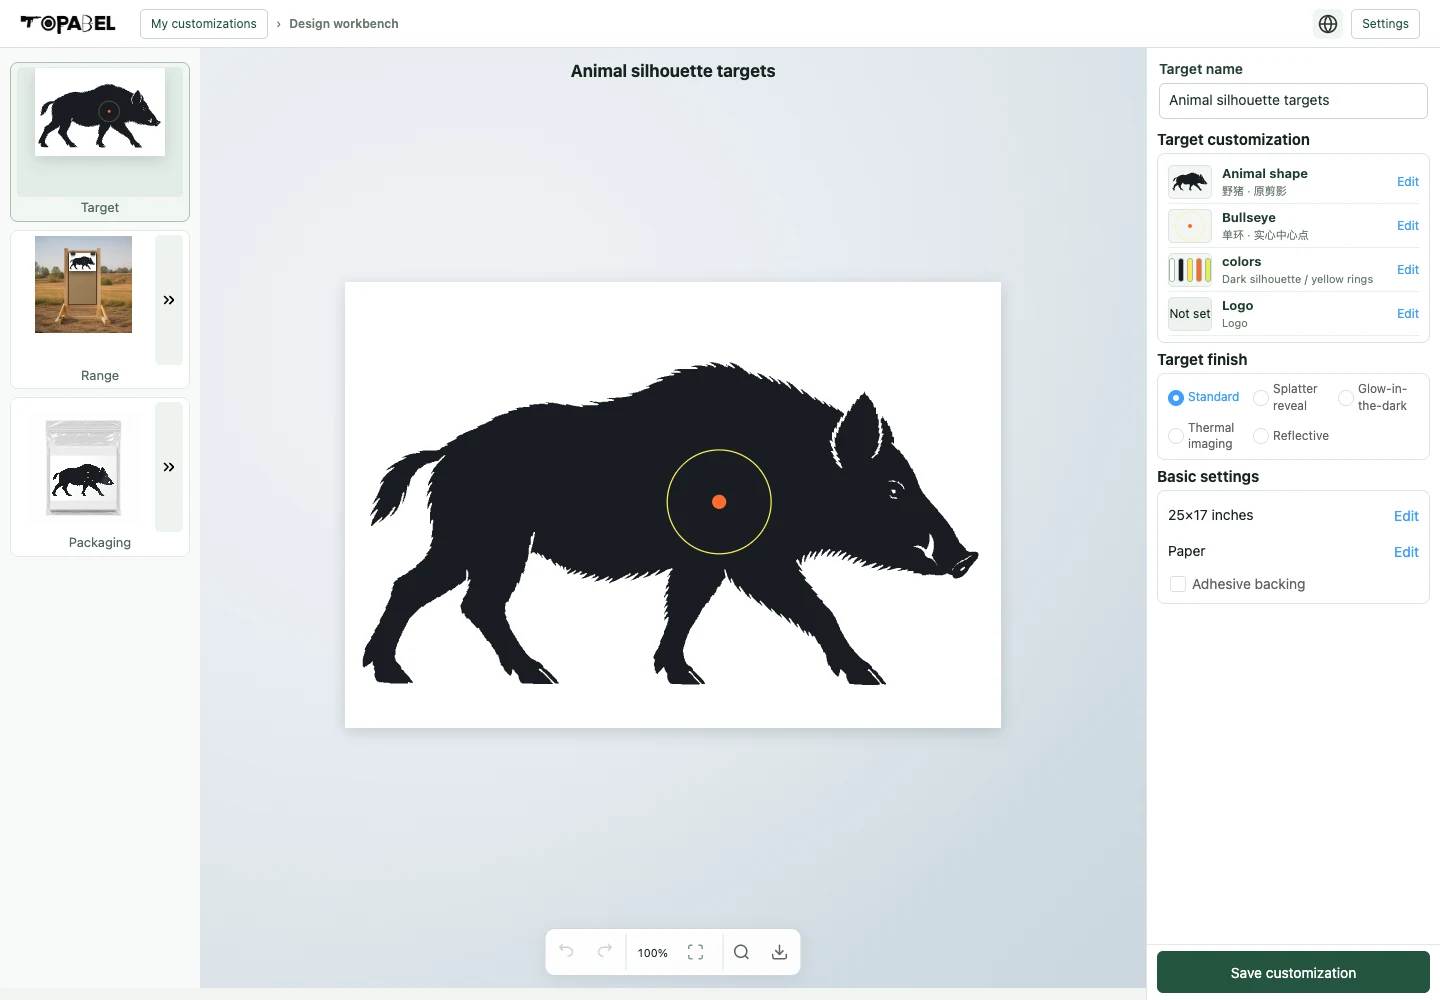
Realistic or line-art scene and patterning animals are different from silhouette materials. Cropped or hidden source areas are not automatically reconstructed. A smooth visual silhouette is not a production cutting path.
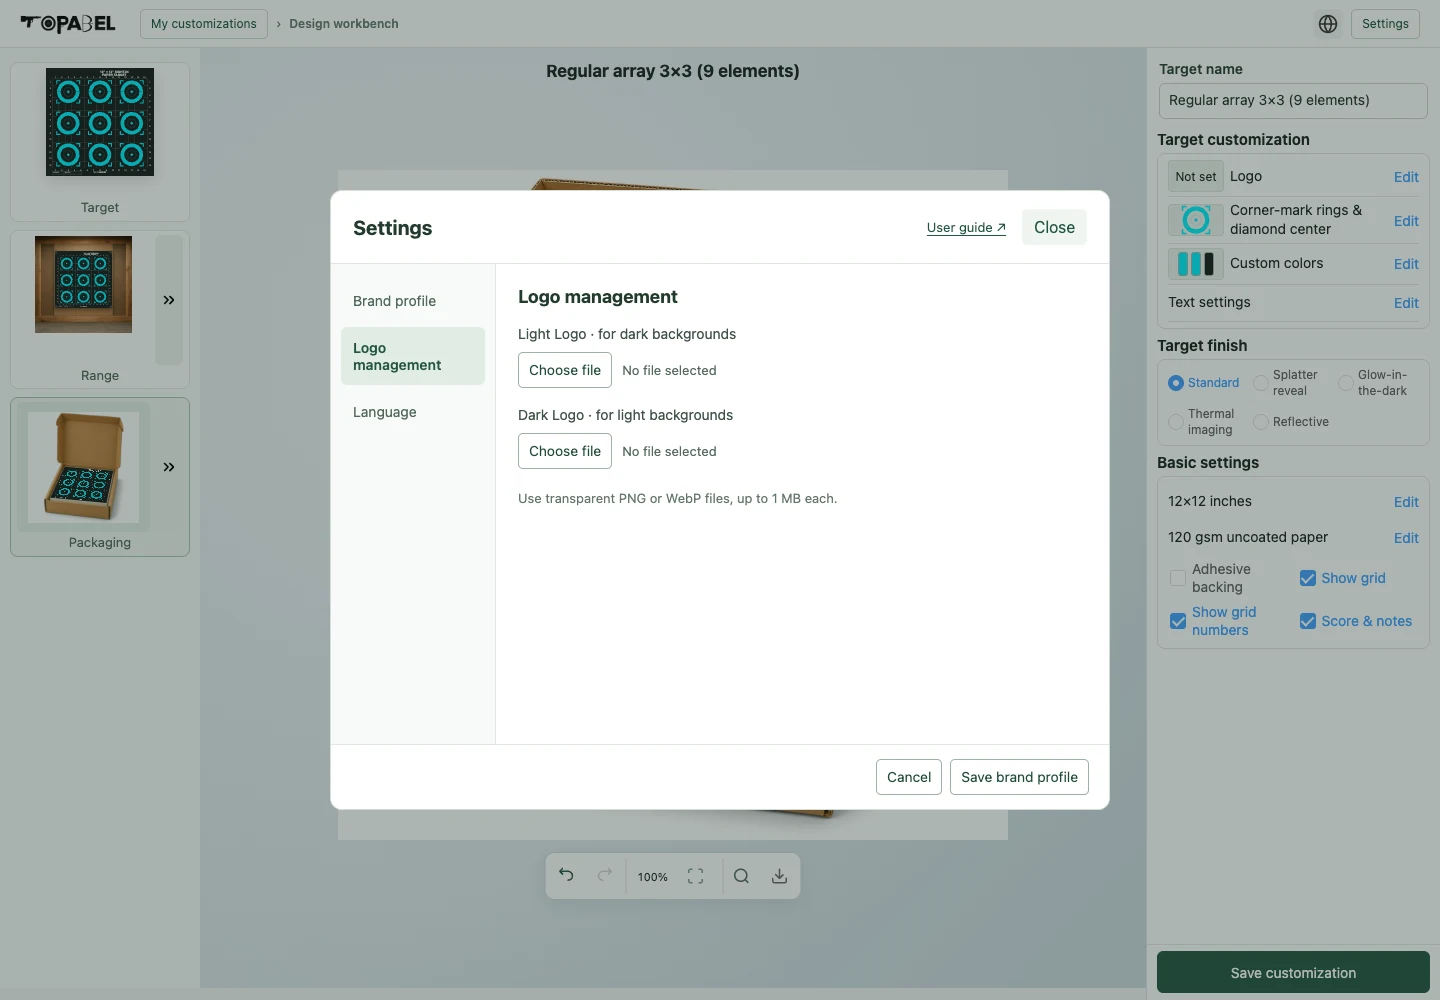
Open Settings at the top right. Enter your brand name under Brand profile, switch to Logo management to upload both a light and a dark Logo, then click Save brand profile. PNG, JPEG and WebP are supported. Transparent PNG or WebP is recommended; each file must be no larger than 1 MB.
New designs automatically use the logo saved in your brand profile. When using your brand Logo, the workbench selects a light or dark version to suit the placement area. Expand Adjust current Logo to change its upload, width or position. Updating your brand profile does not update previously saved target designs.
The percentage is relative to the sheet width. When space is limited, the Logo is reduced and the control shows its actual width alongside the requested width. Try another position, reduce nearby content, or choose a layout with more room, then inspect the result on the canvas.
Use the text options available for the layout to adjust wording, font, size or position. Under Basic settings, use Edit to change the sheet size or paper material. Select Adhesive backing if needed. Paper color is available on supported layouts. After changing a finish, check the available material and adhesive options again; use the options currently offered by the interface.
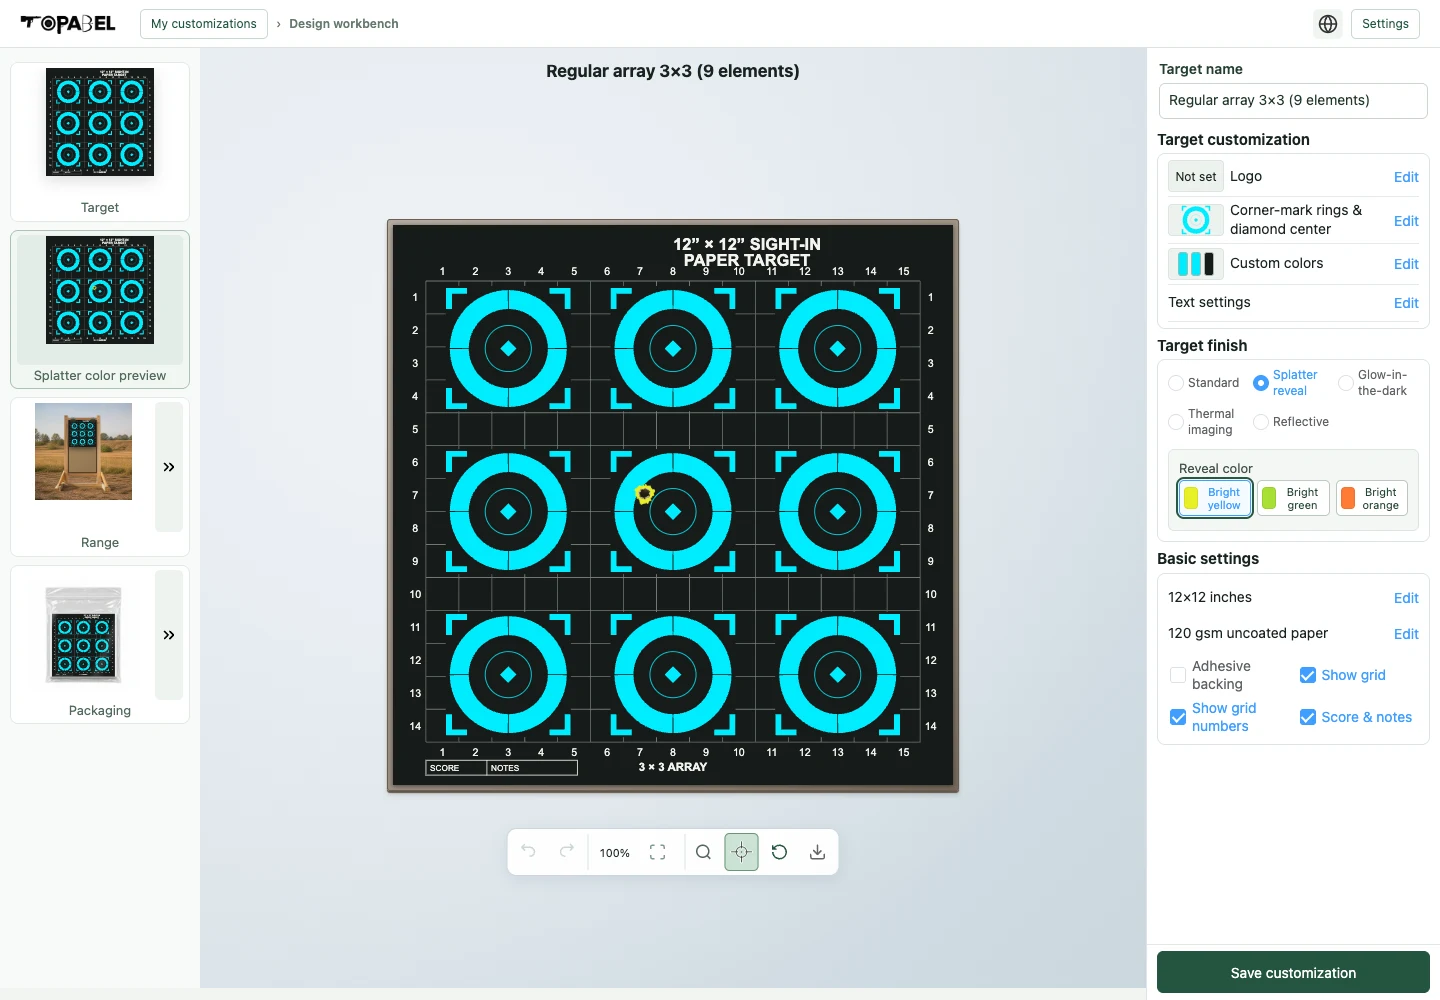
Select a finish under Target finish on the right. Then open the corresponding preview on the left. All four special finishes below use the same 3×3 sight-in layout, SKU TB-SI-ZP-1212-SP-SPL-32. Options vary by layout.
| Effect | What to do | What to look for |
|---|---|---|
| Standard | Adjust the printed colors and paper. | Check the contrast of artwork, text and Logo against the background. |
| Splatter reveal | Choose a reveal color, open Splatter color preview, and use the crosshair icon to place a simulated impact. | A contrasting color appears around simulated impact points. The reveal color is separate from printed target colors. |
| Glow-in-the-dark | Open Afterglow preview and switch between After charging and Faded afterglow. | This illustrates afterglow following light exposure and its decay, rather than continuous self-powered illumination. |
| Thermal imaging | Open Thermal imaging preview and switch the observation palette between White hot, Black hot and Iron red. Choose an implementation option where offered. | Compare thermal contrast. A display palette does not change the heating method. |
| Reflective | Switch Daytime and Night illumination. | Night illumination illustrates reflection under external light. The material does not emit light by itself. |
Previews are illustrative. They do not specify measured brightness, temperature, glow duration or material performance. Confirm materials, coverage and production results with a physical sample.
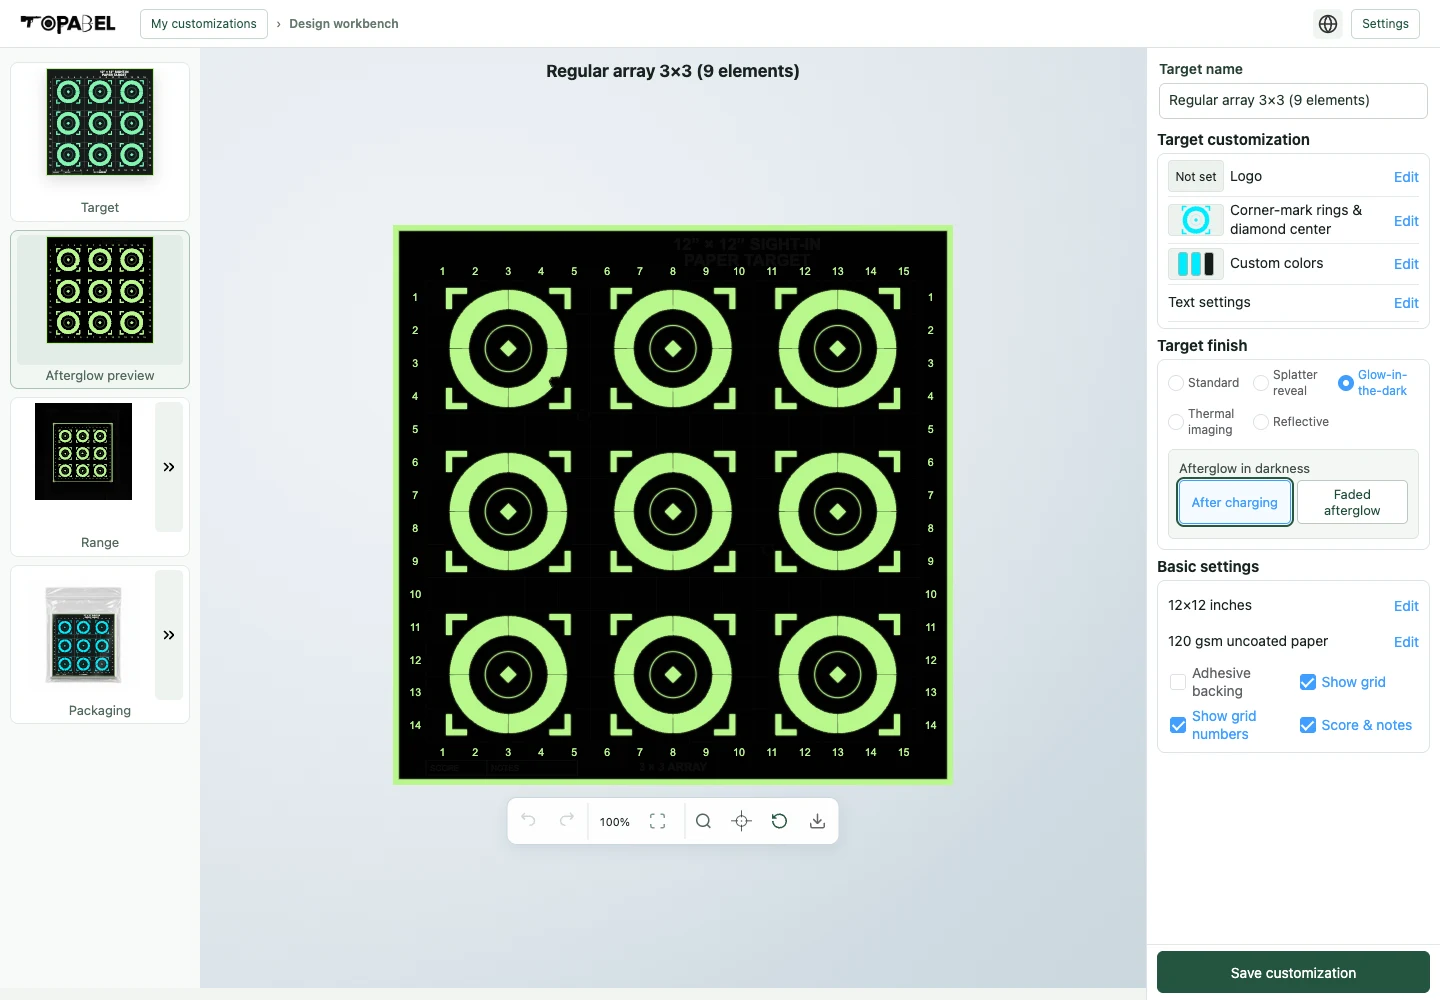
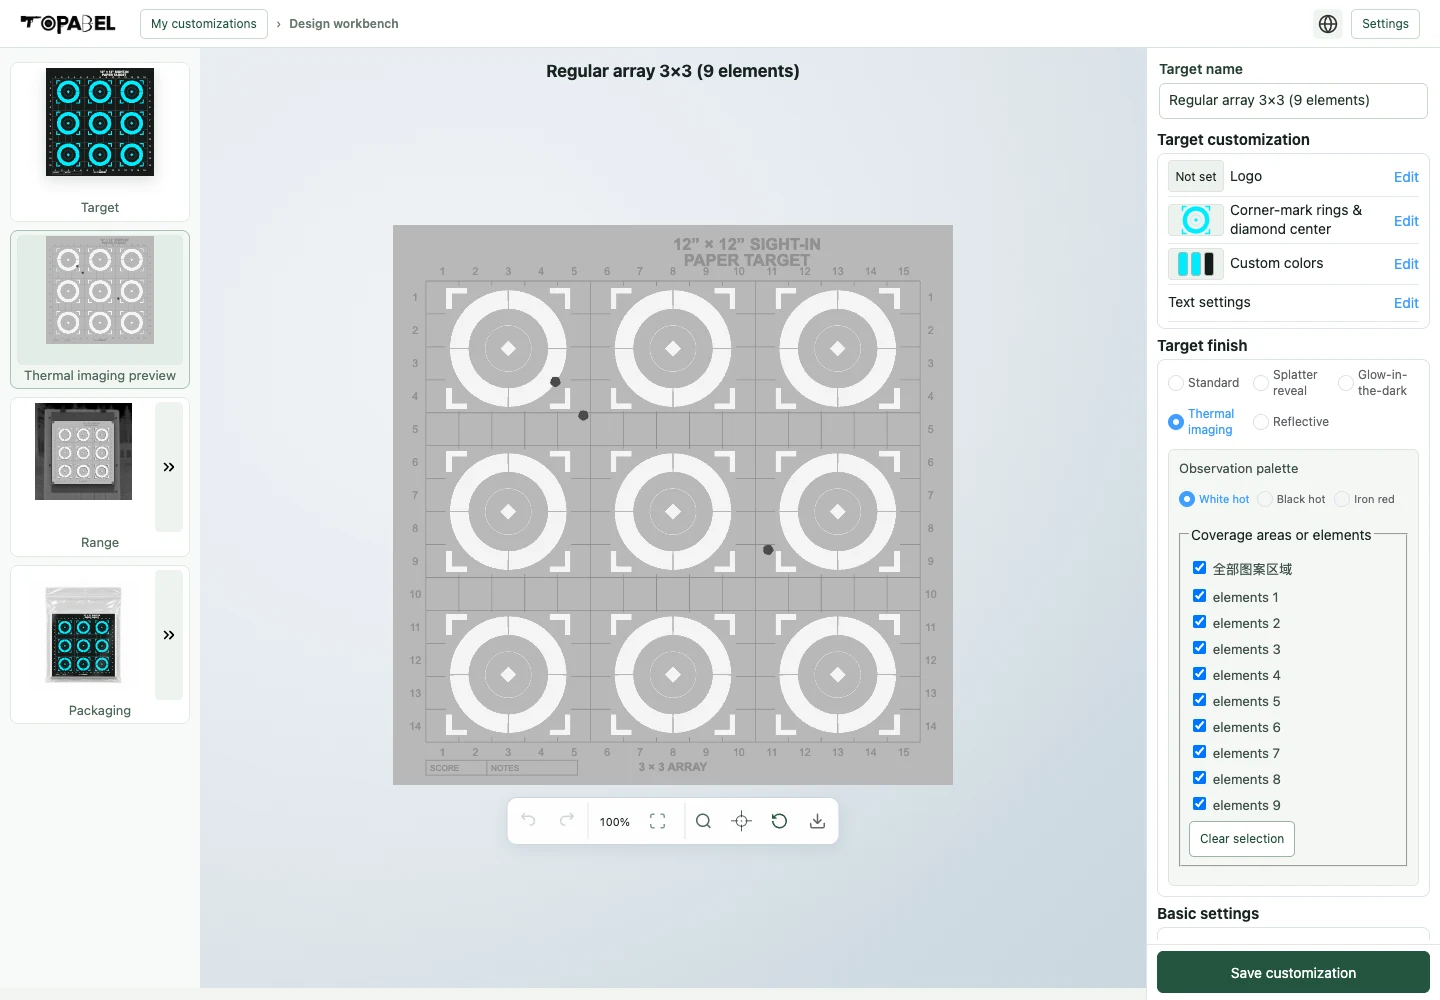
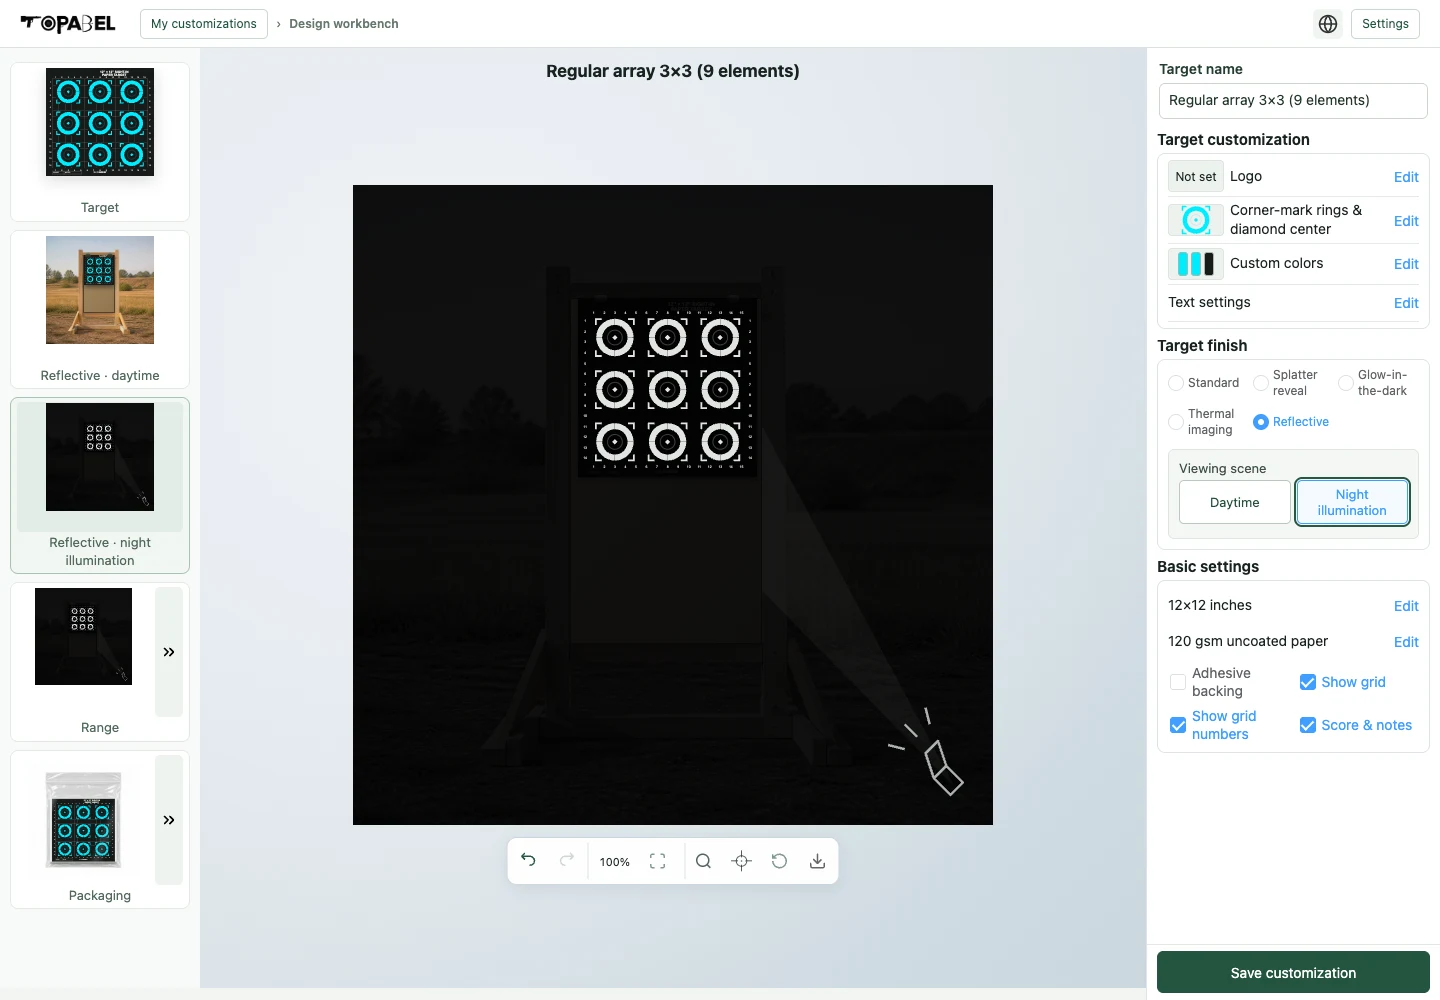
The left preview rail contains Target, Range and Packaging. Special finishes add their corresponding effect preview. Select a thumbnail to change the main view; select Target to return to the design.
The toolbar below the canvas includes Undo, Redo, zoom, Fit to canvas and the magnifier. Target view also offers the stacked-layers icon for 3D layer view. The crosshair and clear icons are available in Range and supported finish previews. The download icon is disabled for guests. Scroll over the main preview to zoom, or use Ctrl / ⌘ with plus or minus; use Fit to canvas to restore the full view. Touchscreens support pinch zoom.
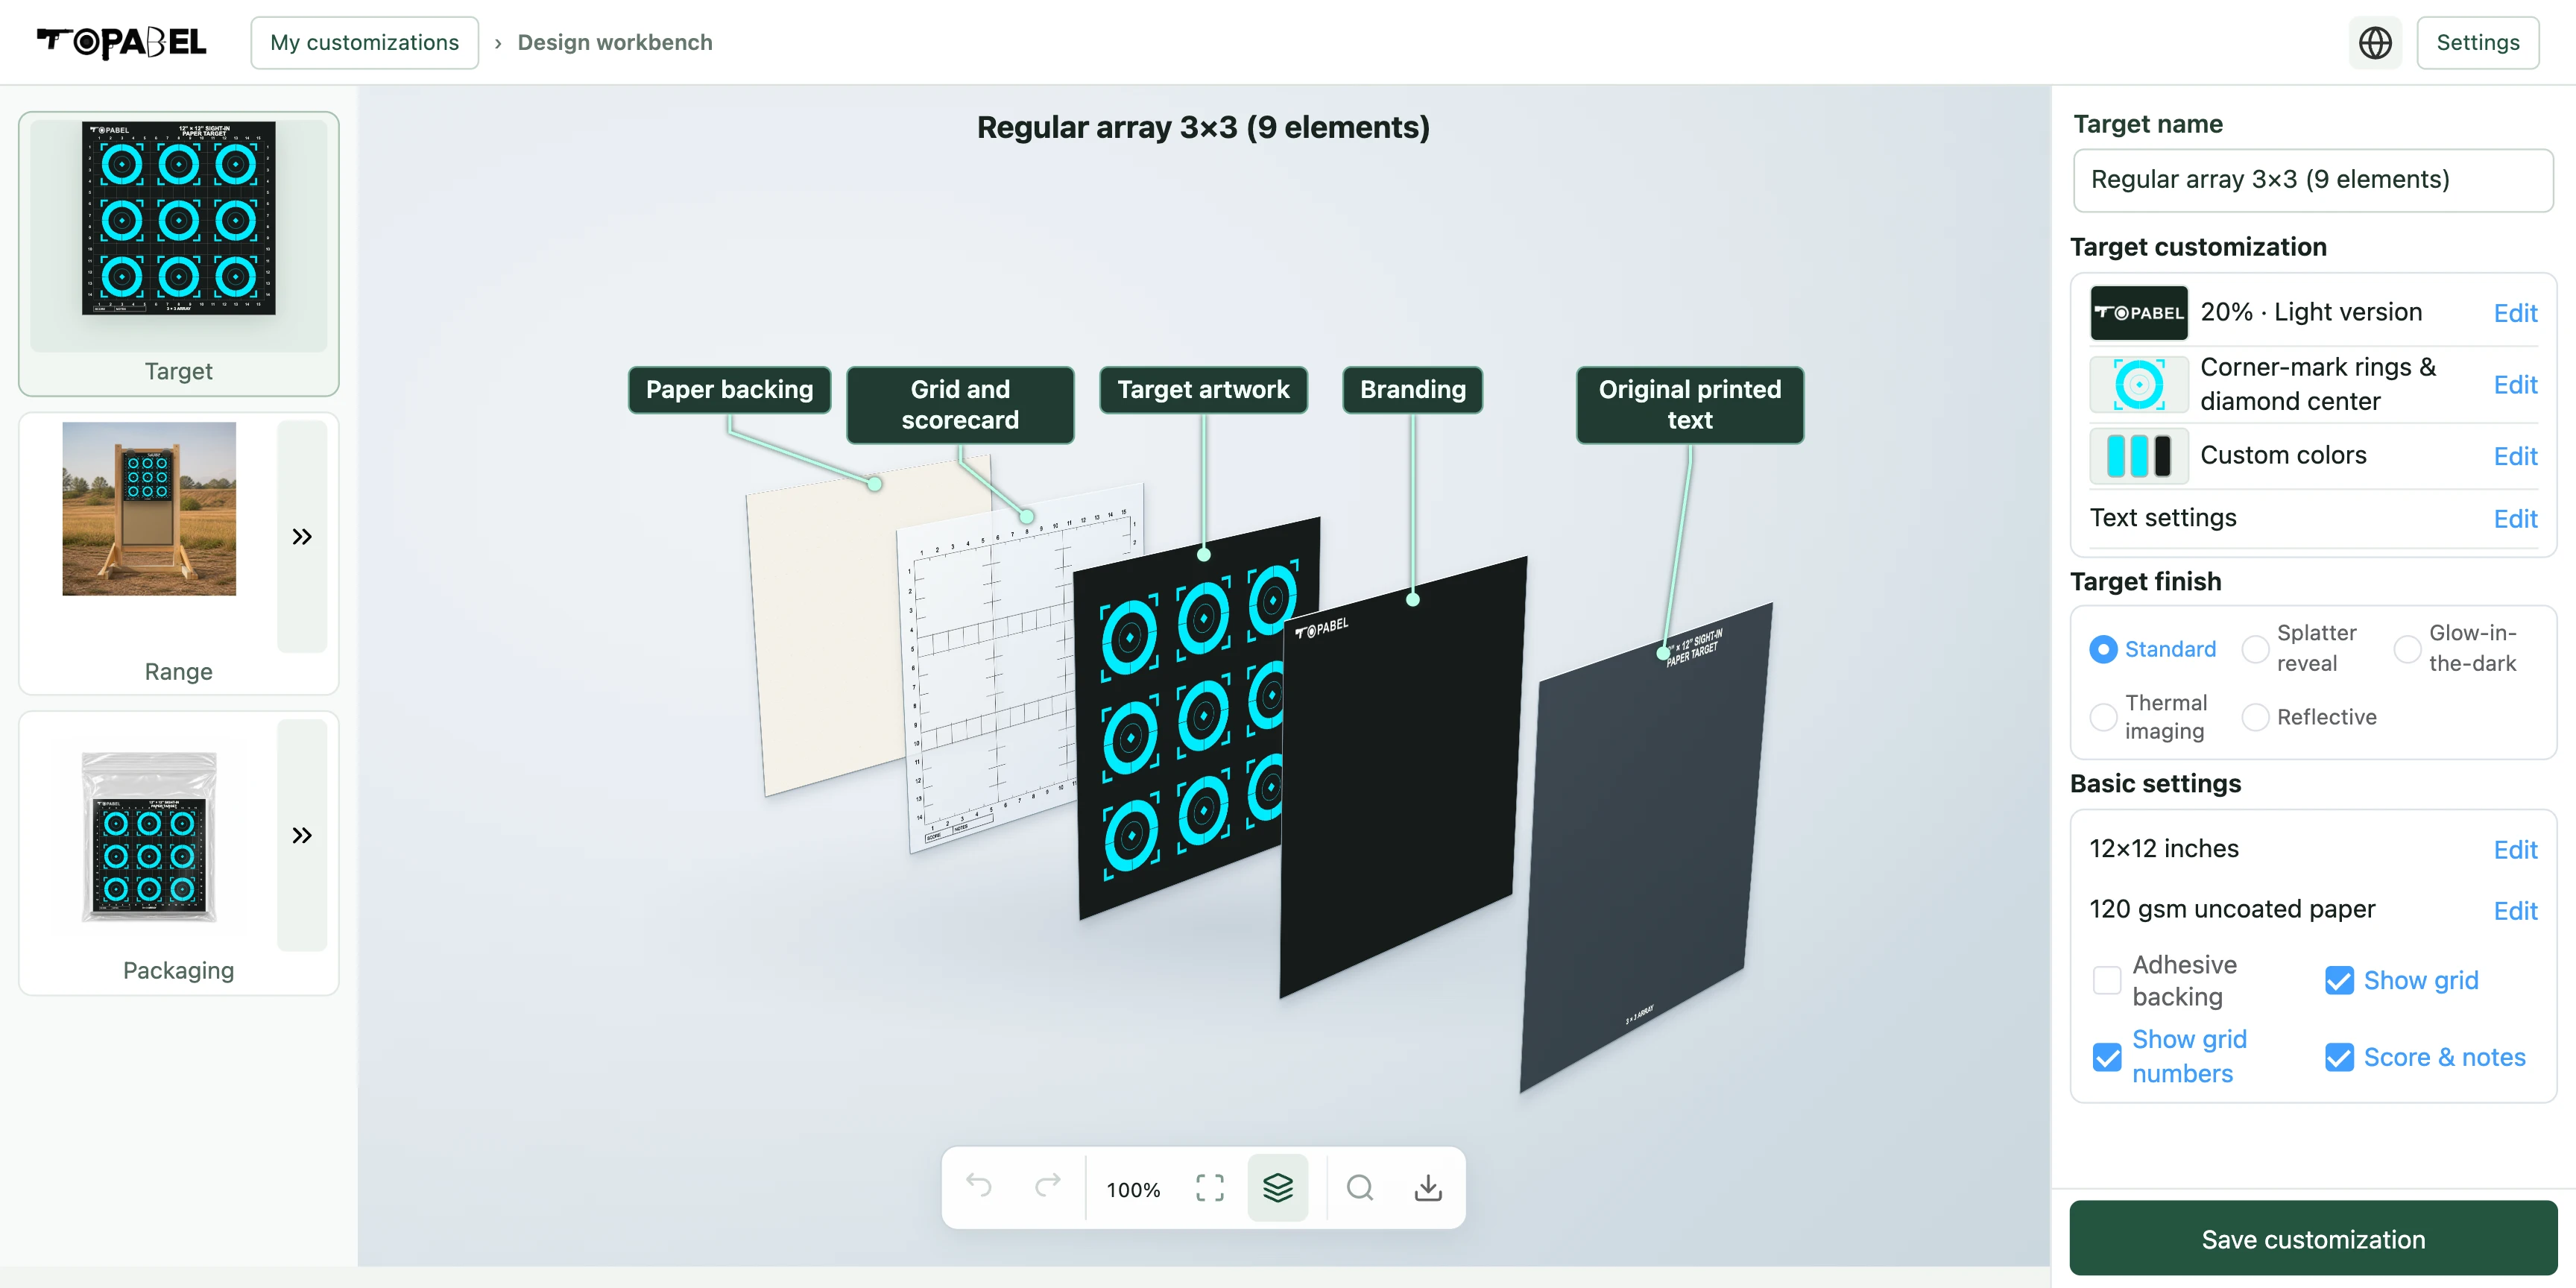
Layers depend on the selected template, its settings and finish. The spacing is for inspecting the design.
Use the double arrow beside Range to open its choices. Switch Outdoor or Indoor, select a scene card, then use Confirm to keep the selection. Cancel or Esc restores the previous choice. Scenes depend on the selected finish.
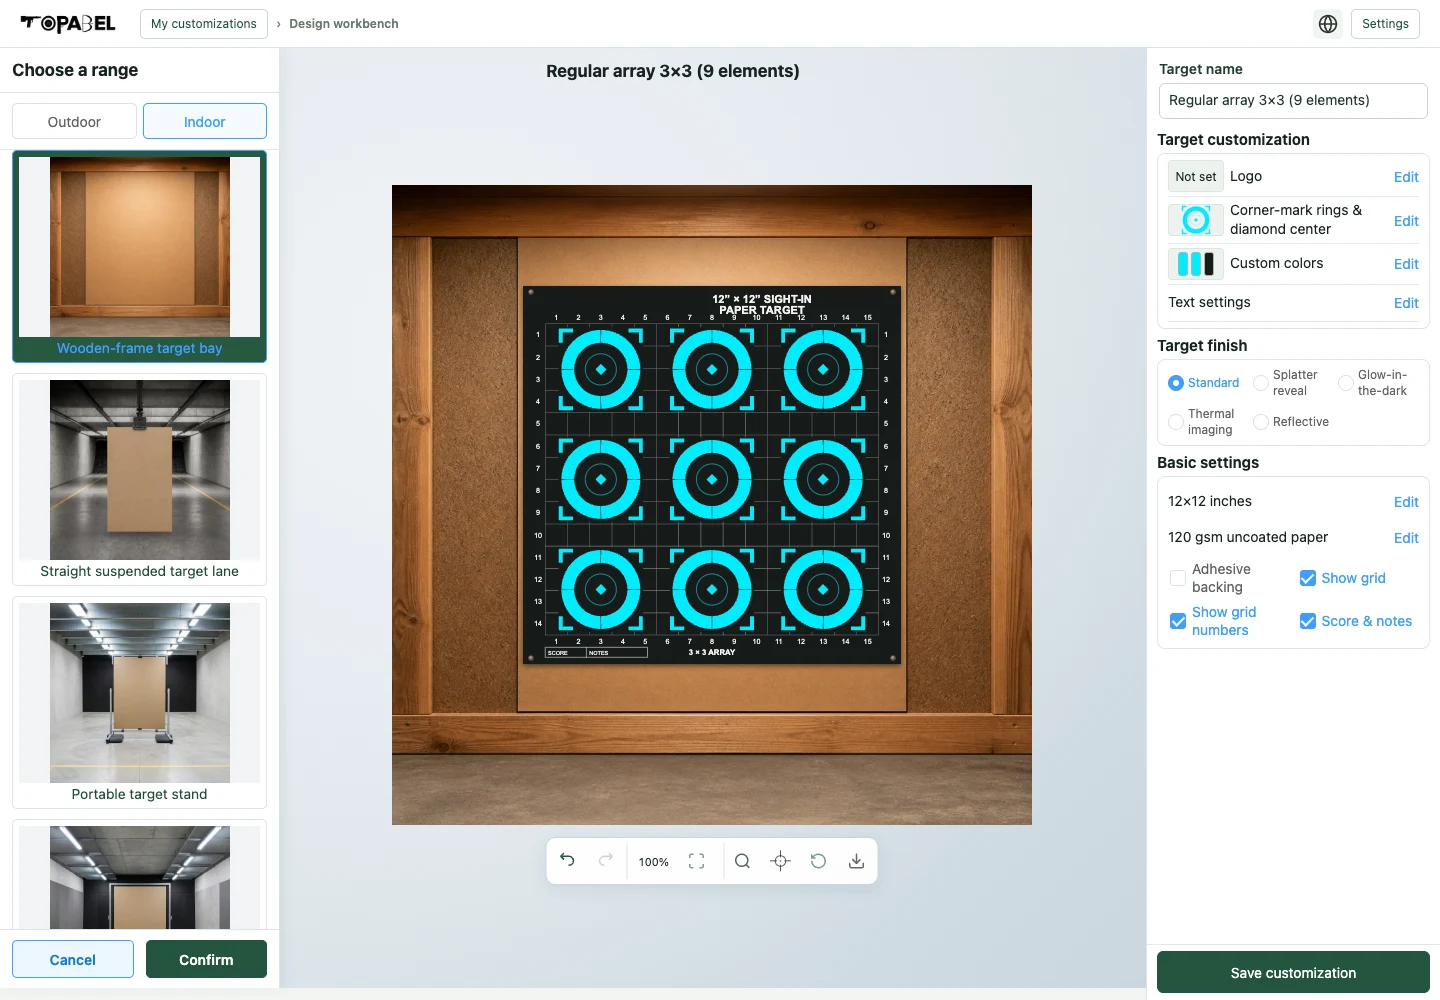
Open Range or a supported finish preview, select the crosshair icon below the canvas, then click the paper to add a simulated impact. Use Clear bullet holes to reset the marks. To inspect a mark, select the magnifier and move over it. Selecting the magnifier turns off simulated shooting and keeps the existing marks visible.
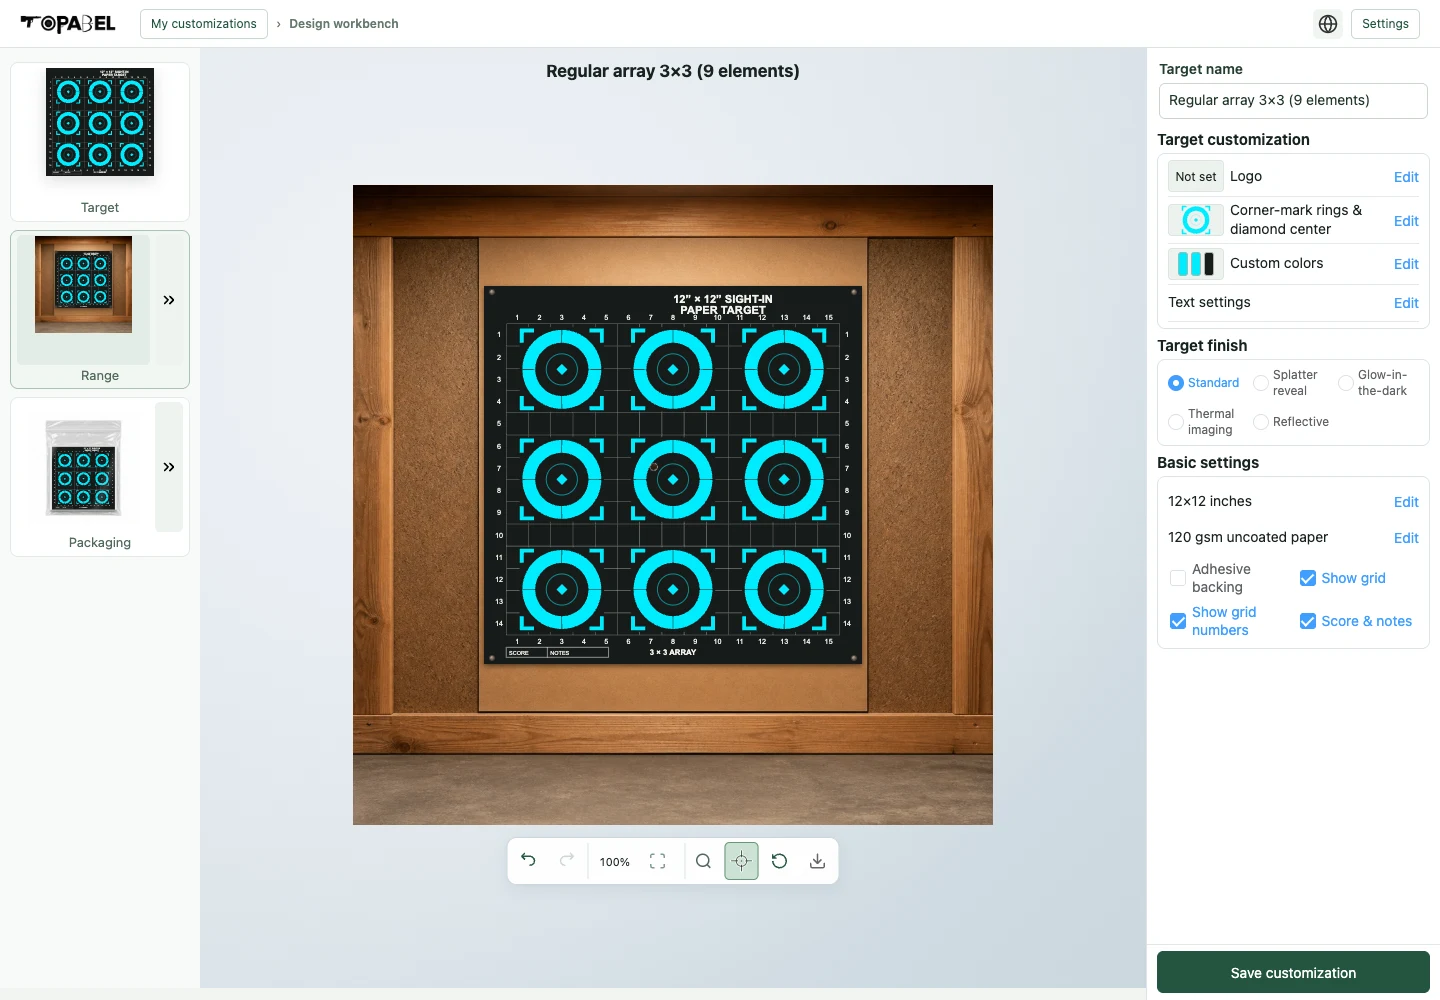
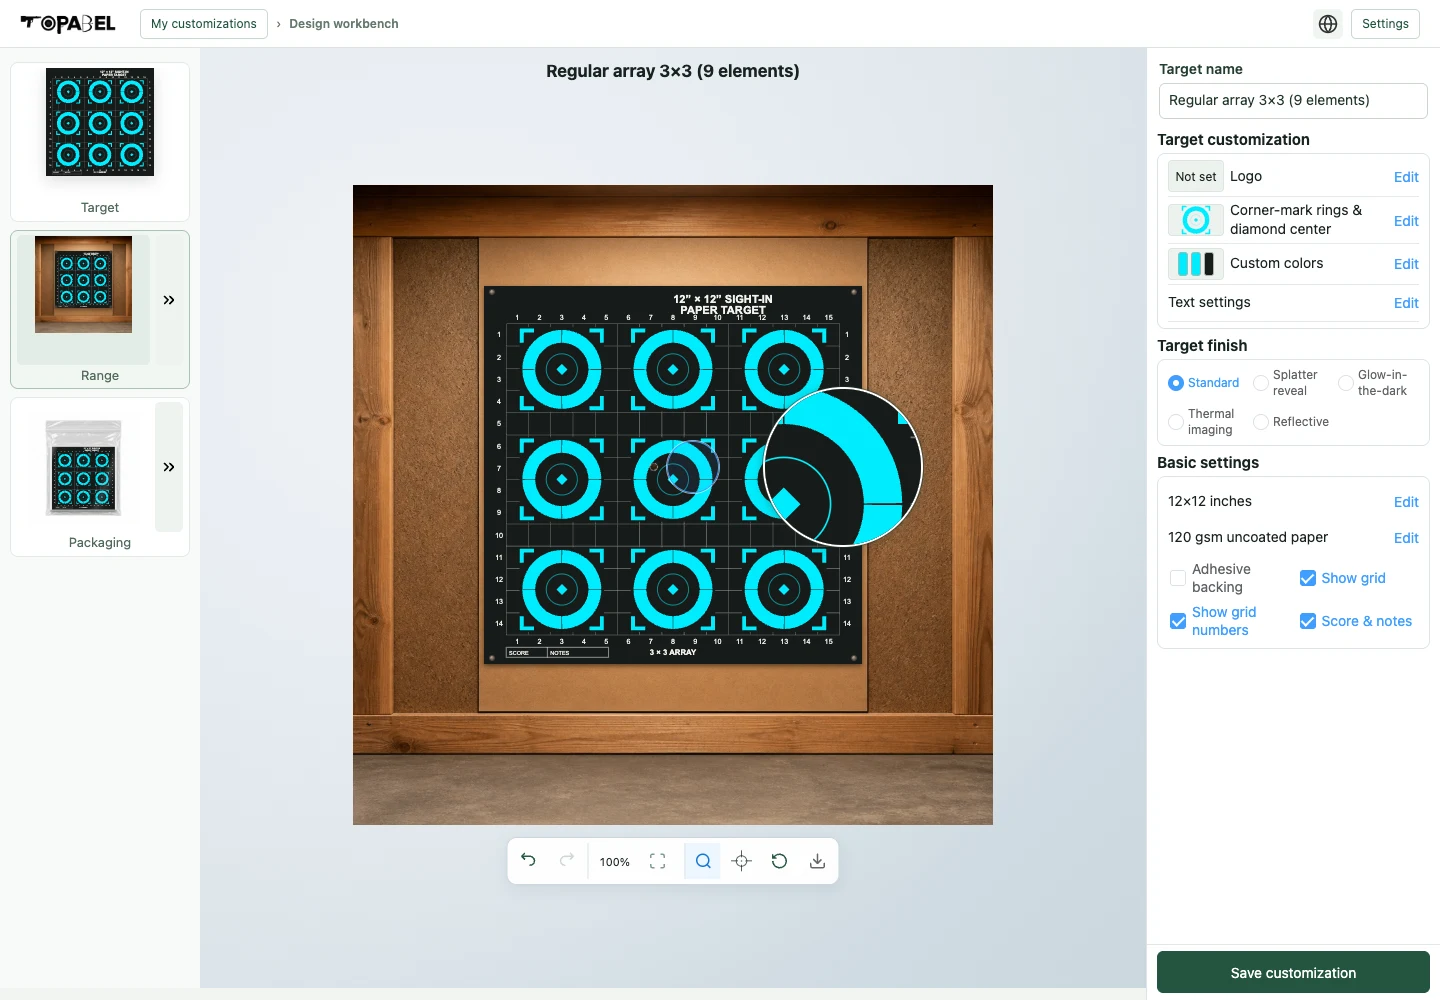
Select Packaging for a mockup, or its double arrow to choose Standard OPP bag, Custom header bag or Custom mailer box. Preview a choice, then Confirm to retain it or Cancel to restore the previous selection.
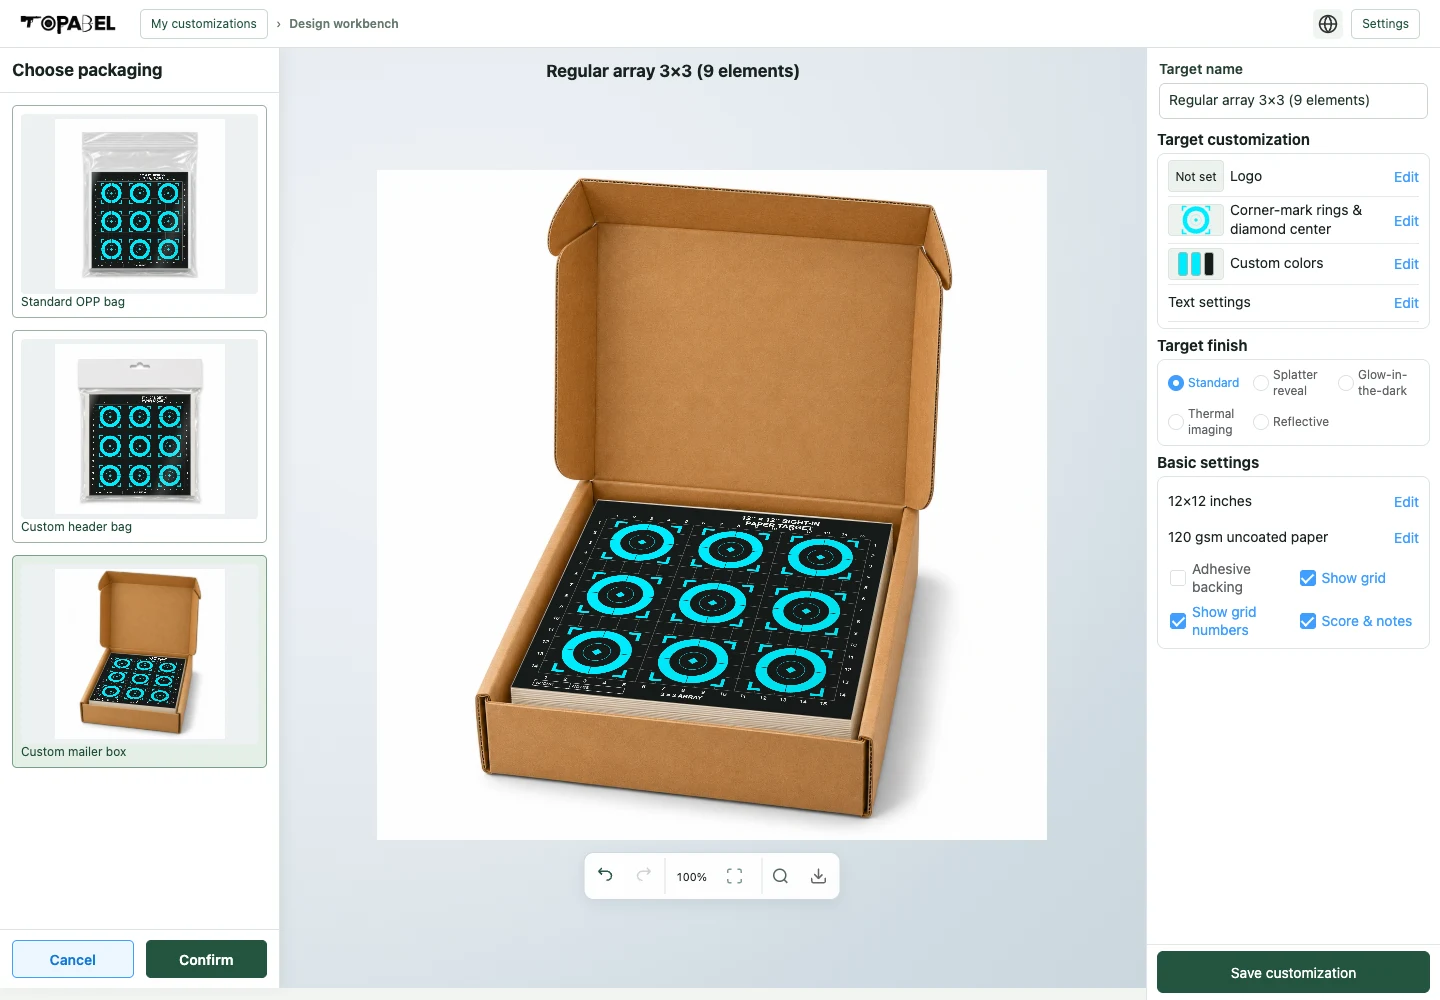
Use simulated impacts, range scenes and packaging mockups to discuss your design. Confirm materials and production details with TOPABEL.
Guests cannot download target images. Downloads require a registered account and sign-in. Registration and sign-in are not yet available in the current workbench, so the download icon is disabled. You can still customize, preview and save designs in this browser.
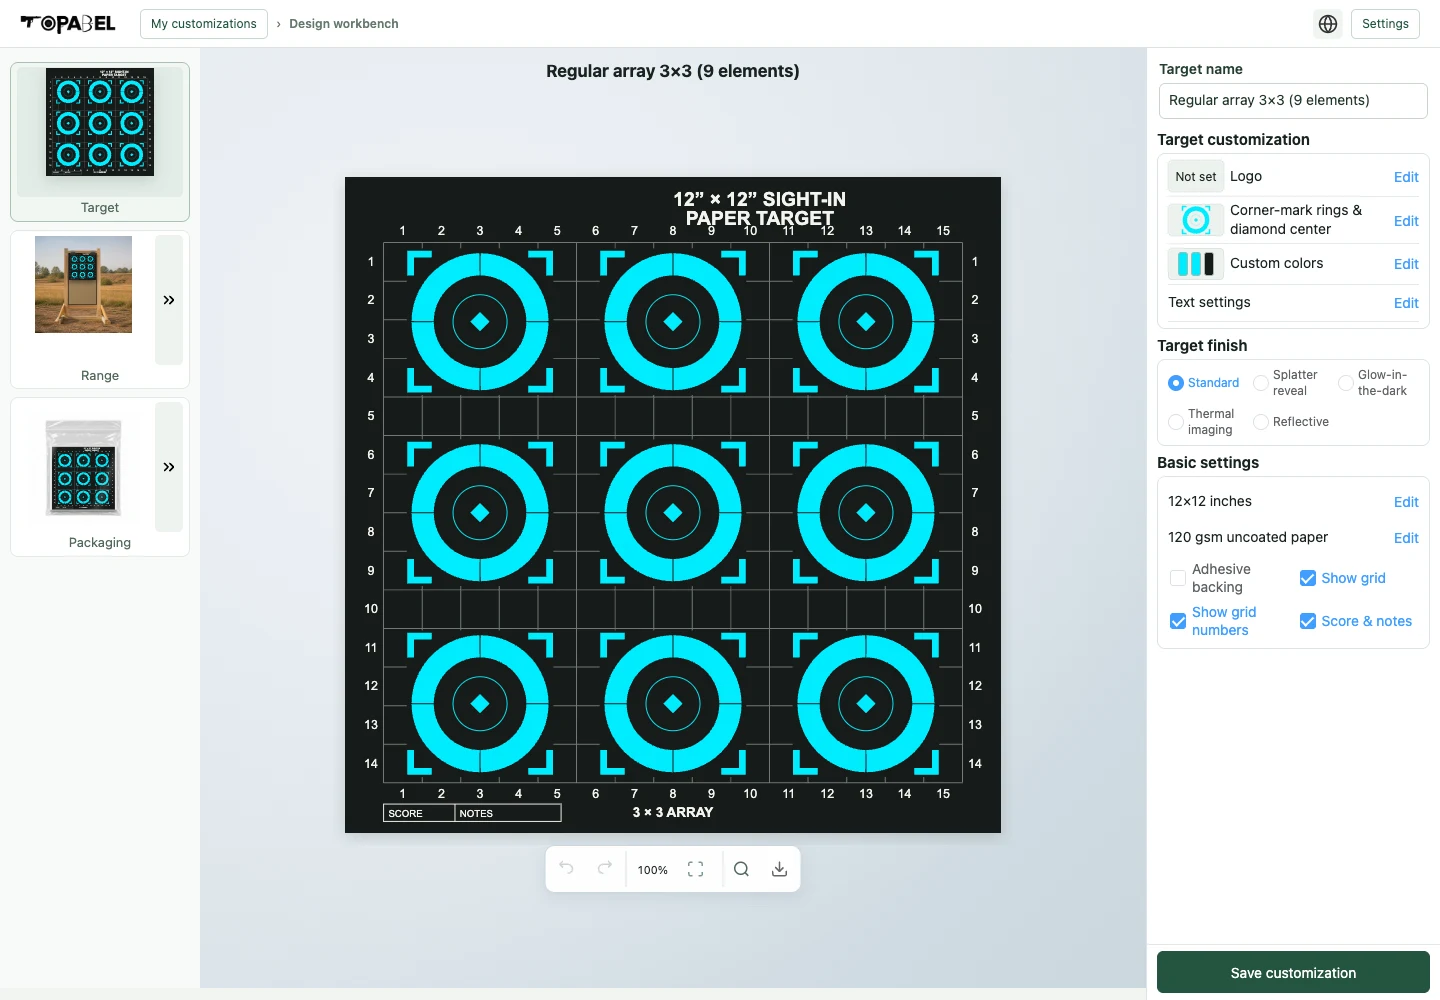
The workbench attempts to retain changes automatically. Use Save customization at important milestones and check the status. If saving fails, keep the workbench open, check whether site storage is allowed, then try again. You can capture the preview for reference.
Designs are stored on the current device, in the current browser, for this site. There is no cross-device cloud sync. A different browser, device, private window or cleared site data may not contain your original designs. Local preview addresses and the production site also have separate storage.
Use the language menu at the top right, or Settings → Language. Your choice is retained in the current browser. Names and text you enter are not automatically translated.
Check that you are using the same device, browser and production site, then scroll through the saved list. Private browsing and cleared site data affect local storage. There is currently no cloud recovery option.
Only cards with Start customizing are available. Not yet available means customization has not been enabled for that category.
Check both light and dark brand versions. Expand Adjust current Logo and try another position or width. Read the actual-width hint and consider a roomier layout. Transparent padding inside an image can also make the visible Logo look smaller.
First-time loading can take a while. Wait and check your connection; avoid repeated clicks. If needed, refresh and reopen a saved design. Confirm that the main canvas has fully loaded before saving.
Use Undo removal immediately after confirming removal. Do this on the current page; this is not a permanent recycle bin.
Check the contrast between each area and the background, both on the main canvas and in thumbnails. Start from a preset and fine-tune one color at a time.
Check that the layout has the relevant target area. Incompatible proportions, units, scoring structures or occupied space can make a choice unavailable or omitted. Complete bullseye faces also require auxiliary centers and patches to be removed; use the compatible choices currently offered. Use a compatible choice rather than stretching artwork or changing unit text.
Use the magnifier to inspect numbers, fine lines and edges on the canvas. Enlarging low-resolution artwork cannot recover missing detail. Confirm the artwork and sample for large prints, cutting paths and special finishes.
In sight-in arrays, Show grid displays cells spaced one layout unit apart. Show grid numbers changes only the labels. When a single bullseye or zoned patterning layout offers a measurement grid, check the grid unit and spacing for that layout. Verify the printed spacing on a sample.
我的定制 / My customizations · 开始定制 / Start customizing · 定制工作台 / Design workbench · 修改.. / Edit · 确认/确定 / Confirm · 取消 / Cancel · 保存定制 / Save customization · 继续定制 / Continue editing · 基础设置 / Basic settings · 显示网格 / Show grid · 显示网格数字 / Show grid numbers · 设置 / Settings · 品牌资料 / Brand profile · Logo 管理 / Logo management · 靶面 / Target · 靶场 / Range · 包装 / Packaging · 模拟射击 / Simulate shots · 开启模拟射击 / Enable simulated shooting · 关闭模拟射击 / Disable simulated shooting · 清除弹孔 / Clear bullet holes · 下载靶纸图片 / Download target image · 页底记录表 / Bottom record table · 暂未开通定制 / Not yet available
Use the designer to make your ideas clear. Work with TOPABEL to take them further.
Saving locally does not send your design to TOPABEL. Attach a screenshot or reference image to your email. Previews help discuss the design; physical samples confirm print, material and surface effects.
quote@topabel.com · Attach your design image in your usual email service.